
Pellet machine set up is essential to ensure continued and consistent pellet production. Unfortunately, most people do not realize how critical it is to properly calibrate and adjust the machine. If you are running a wood pellets machine, you will want to make sure that you follow these quick steps in order to keep your production rate high and your pellet quality consistent.
Today I’m going to show you how to set up your own pellets mill machine. Whether you want to use it for your own pellet fuel or a small business, getting started with a pellet mill is relatively easy. Below, you’ll find an extensive guide on how to set up a pellet mill. We’ll discuss in-depth the following steps:
Read the manual that came with your pellet machine before getting started.

It’s important to learn the basics before you start any DIY project, and a pellet mill is no exception. If you want to making your own pellets, the first step is usually reading the manual that came with your equipment, and this goes double for pellet machines since they can be quite complex. It’s important to read the manual so you know some of the major parts of the pellet equipment and how it operates, as well as what kind of maintenance is needed, what kinds of materials it can process, and any safety precautions you should take.
Some wood pellet machine have their own website where you can download a manual—and if one doesn’t exist, it’s very likely that YouTube has a video explaining how to use the machine. Just type in “How to Use Pellet Mills” into Google or YouTube and you’ll find a ton of tutorials.
While you’re at it, be sure to look up any safety precautions that come along with your new pellet mill. Some types can be dangerous if not used properly: for example, only handle them when they’re unplugged! If there are any safety questions or concerns, consult with an expert who can make sure you get started off safely before you get started off on your project.
Place your pellet mill on a secure, flat surface.
To set up a wood pellet mill, place it somewhere that has a lot of flat, open space. A garage or an empty room works well—in fact, the more open space there is around the pellet machine, the better the results will be. You can put it on a table or lay it down on the floor. If you put it on a table and the table is at a height you’re uncomfortable with, you can build a frame to raise the pellet machine up—just make sure that there’s enough room underneath to store everything you’ll be processing!
If your pelleting equipment isn’t laying in an area with enough room to move around it easily, it will be hard for you to add materials or process them. It also makes removing the finished items more difficult.
When setting up your pellet mill equipment for its first use, make sure that you place it on a level surface. Level ground is ideal; if this isn’t possible, use shims under the legs
Check your die and rollers for cracks or damage
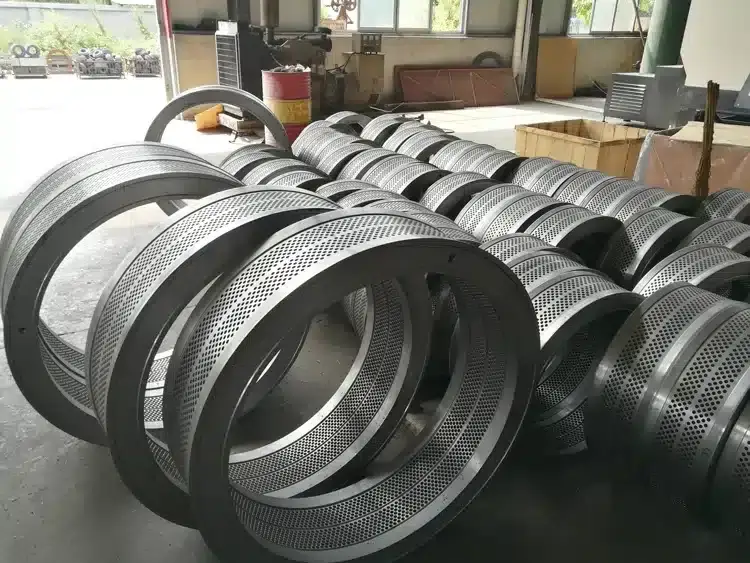
When you set up a pellet mill, make sure to inspect your ring die and rollers for cracks or damage. If the die is damaged, it can lead to jams in the machine, which of course is the last thing you one making pellets. If your rollers are cracked or damaged, they could be hardening up, making it harder for them to grip the pellets. This could increase the likelihood of breakage, which can shut down an entire line in seconds. For best results, always double-check these parts before setting up any kind of production operation.
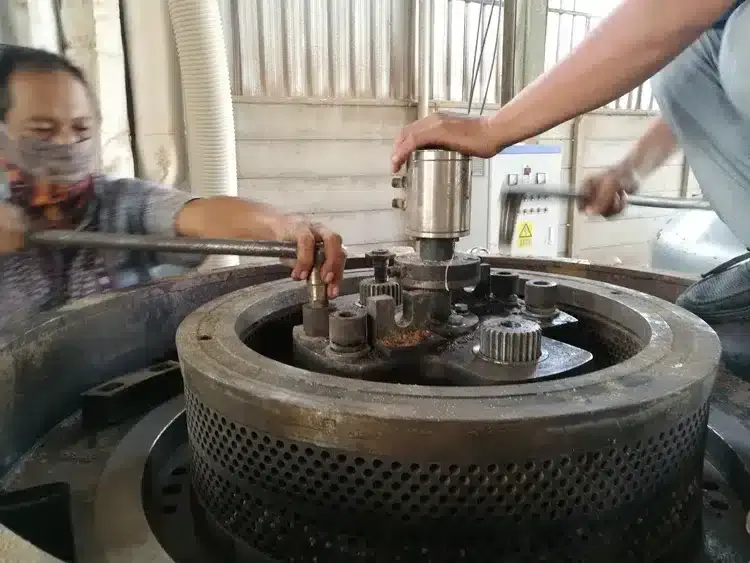
If your pellet mill is making pellet raw material that are too hard, check the die and rollers for cracks or other damage. Check for these issues by removing the ring die, loosening the screws and lifting out the rollers. Check for any visible signs of cracking or other damage. If you see any issues, replace the roller or die as needed. If you do not see any cracks or damage, but the pellets are still too hard, you can try cleaning out your machine by using a 3/8″ drill bit to remove pellet debris from your auger internals. Use caution when cleaning out your pellet machine, as you may damage your auger if you remove too much material.
Start by adjusting the rollers so that they are closest to the outside of your die.
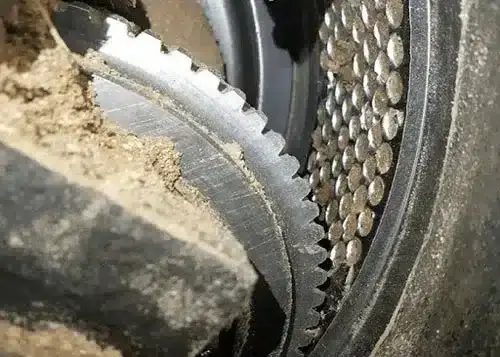
When you’re ready to set up your machine, there are a few basic adjustments that you can make to the rollers to ensure that they are in proper alignment with the die. In most cases, the rollers will be adjusted correctly when they are moved as close as possible to the outside of the die. This is important because if they overhang either side too much, this can cause them to cut unevenly and even damage the dies. Once you’ve made sure that they are far enough out, you’ll want to make sure that they do not touch anything when they move up and down. This will help keep them from wearing out prematurely. The last thing that you’ll want to do is tighten them down too much—you may end up with a “bottoming out” issue where each time you run the press, the rollers dig into the platen and bend it slightly. When this happens, it will cause your die line to become uneven and it could even prevent your dies from being able to properly center themselves on the sheet of raw materials.
Make sure there are no debris in your hopper.
Before you can get started, make sure to clean out the hopper so that there are no remnants of wood or other debris from previous use. You’ll want to start by flipping the switch at the back of your pellet mill to the “on” position. If you’re using a remote control, it’s likely that this switch is the same one that turns your pellet machine on and off. Next, turn your hopper upside down and remove it from the base of your machine. At this point, you should be able to see any build-up in the bottom of your hopper and remove it with a brush or hoe. Once you’ve removed all of the loose pieces, turn your hopper right side up and replace it.
Adjust the roller gap for your specific feed material by cranking the handle on top of the machine clockwise.
Once the machine is set up, you’re ready to start feeding materials through it. Pellet mills work by squeezing the feed against a steel roller with a certain amount of pressure. The rollers are set at an angle so that when they’re rotating, the gap between them widens and closes as the rollers rotate around each other. This is known as the “roller gap”. So how does this work?
The rollers have a certain gap between them, but for any given feed material, there is a perfect gap that will create wood pellet of a perfect size without burning or jamming. To find it, turn the big handle on top of your pellet machine clockwise until you hear it stop. The number on the dial indicates the current gap (larger numbers mean larger gaps). Turn the dial down to decrease the gap and up to increase it. When you’ve found a good setting, leave it as-is! You may need to fine-tune things later if your material changes significantly in size or consistency, but otherwise this will be your new permanent setting. Note: It’s very important to keep track of where you set the roller gap. There are many different types of materials that produce different sizes and shapes of pellets by this simple adjustment alone!
Test-run your machine and then adjust accordingly until you’re producing pellets at the desired diameter.
Test-running your machine will also help you determine whether your pellet mill is producing pellets at the right diameter. The size of your pellets will affect both how much pressure you need to apply and how long it will take to make an adequate amount, so it’s important to ensure that you’re producing the size and quantity of biomass pellets you want before investing in expensive equipment for your business. Once you’ve found the ideal settings, make sure you adjust them before each day’s production—the temperature, humidity, and other factors outside your control might have changed from yesterday, and you’ll want to make sure your machine is producing pellets at the same diameter as before.
To get the right diameter, you might have to make adjustments along the way. For example, if your wood chips are coming out too large, try changing the size of wood chipper. If they’re coming out too small, try increasing the speed of the auger in order to push them through more quickly. Once you’ve settled on a configuration that allows for optimal diameter and pellet flow, begin producing full batches at one time. This should ensure consistency between each batch, so that you can make adjustments once and then run production until you have enough pellets for your purposes.
Conclusion
Now that your pellet machine is up and running, you can be confident that you know how to use it properly. At any point, if you have questions about how to use your pellet machine, feel free to contact us at TCPEL. We will be happy to answer your questions!
Also Read:
10 Main Reasons Why Your Pellet Machine not Discharge and Low Capacity
Why Your Wood Pellets Blacken and Pellet Mill on Hold?